Chicago winters hit hard. Discover seven practical strategies to protect your pipes from freezing and what to do when prevention isn't enough.
Share:
Request a Callback
Want to skip the wait?
Simply enter your contact details, and we’ll call you when a Go Rooter Advisor becomes available.
Summary:
You wake up on a January morning, turn on the faucet, and nothing happens. Or worse—you hear water running somewhere it shouldn’t be. Chicago winters don’t mess around, and neither do frozen pipes. When temperatures drop into the teens and stay there, the water in your plumbing can freeze solid in hours, creating pressure that splits copper, PVC, and even cast iron.
The aftermath isn’t pretty. Burst pipes dump gallons of water per minute into your home, soaking floors, ruining drywall, and turning a cold morning into a costly disaster. But here’s the thing: most frozen pipe emergencies are preventable. You just need to know which pipes are vulnerable, what actually works in Cook County’s climate, and when to call for backup. Let’s start with understanding why Chicago homes face this problem year after year.
Chicago winters create perfect conditions for frozen pipes. We’re talking sustained temperatures below 20 degrees, wind chills that make your face hurt, and cold snaps that last for days. Your plumbing wasn’t designed to handle Arctic conditions, especially if your home was built before modern insulation standards.
Water freezes at 32 degrees, but your pipes don’t typically freeze until it gets colder and stays that way. The real danger zone hits when outdoor temperatures drop below 20 degrees for six hours or more. That’s when the pipes in your unheated basement, crawl space, or exterior walls start turning into ice blocks.
The expansion is what kills you. When water freezes, it grows by about nine percent. That doesn’t sound like much until you realize it’s creating pressure exceeding 2,000 pounds per square inch inside your pipes. No pipe material can withstand that kind of force indefinitely. Something has to give, and it’s usually your plumbing—often at the weakest point, which might be several feet away from where the actual freeze happened.

Not all your pipes face equal risk. Some locations are practically begging for trouble when the mercury drops.
Pipes running along exterior walls top the list. These lines get exposed to cold air seeping through your home’s envelope, especially in older Chicago buildings where insulation wasn’t a priority. You’ll find these in kitchens and bathrooms that back up to outside walls—exactly where you need water most.
Your unheated spaces come next. Basements that don’t see much furnace action, crawl spaces under first-floor additions, attics with supply lines running through them, and that detached garage where you ran a water line years ago. These areas can drop to near-outdoor temperatures during cold snaps, and the pipes running through them freeze solid.
Outdoor fixtures are sitting ducks. Hose bibs, sprinkler system lines, and pool supply pipes get hit first and hardest because they’re literally outside. If you didn’t drain these before winter, you’re gambling every time the temperature drops.
Even pipes inside your home can freeze if they’re in the wrong spot. Kitchen and bathroom cabinets built against exterior walls create little cold pockets where pipes run. Close those cabinet doors on a subzero night, and you’ve just cut off the warm air that was keeping those lines above freezing.
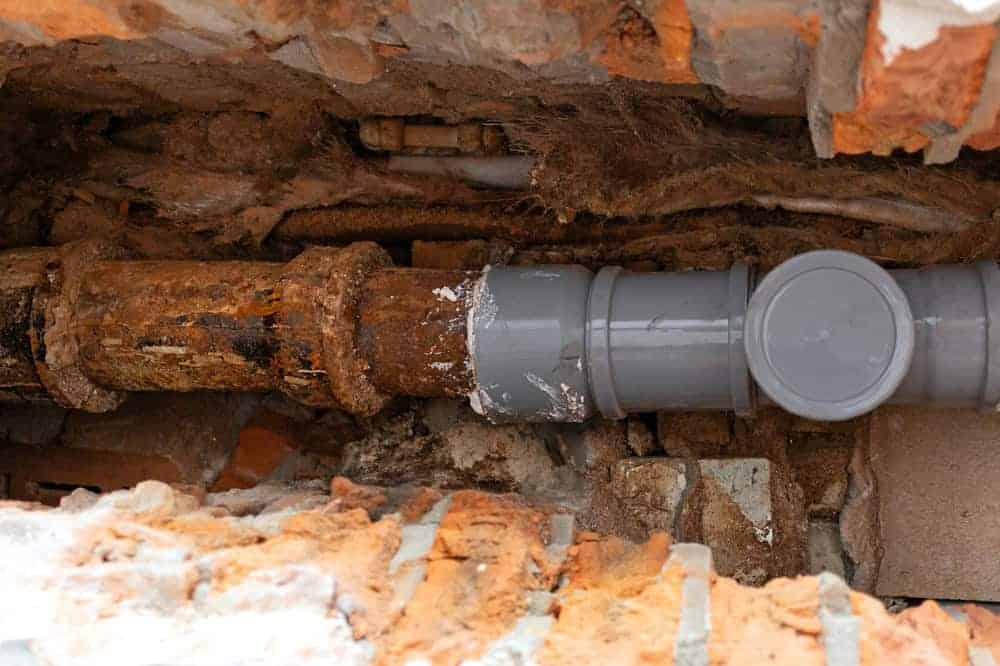
Chicago’s aging infrastructure adds another layer of risk. Many neighborhoods still have homes with galvanized steel or cast iron pipes that were installed decades ago. These older materials don’t handle freeze-thaw cycles as well as modern PEX or copper, and they’re more likely to develop weak points that fail under pressure.
Prevention beats repair every single time. The money you spend on proper insulation and heat tape costs a fraction of what you’ll pay for emergency frozen pipe repair and water damage cleanup.
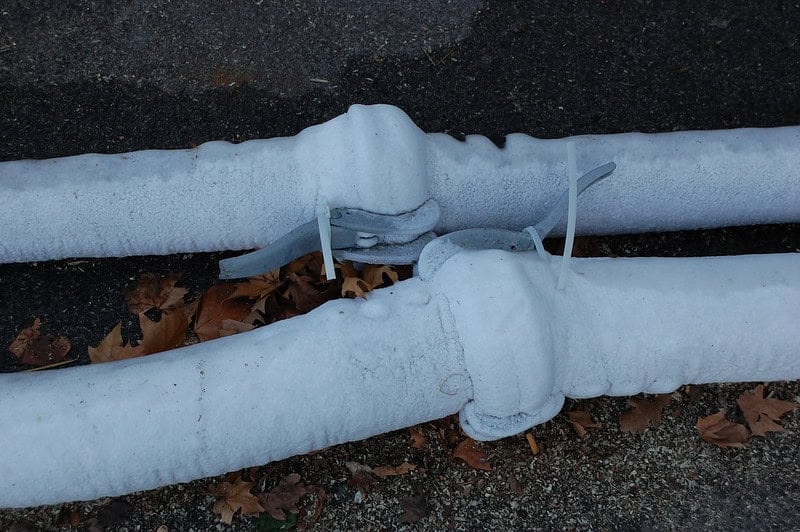
Start with foam pipe insulation sleeves. These split tubes of closed-cell foam wrap around exposed pipes in basements, crawl spaces, and attics. They’re cheap, easy to install, and they work. Focus on pipes running along exterior walls first, then tackle everything in unheated spaces. Half an inch of foam insulation provides solid protection down to about zero degrees. If you’re dealing with extreme cold or particularly vulnerable pipes, bump up to one-inch thickness.
Heat tape changes the game for pipes that face brutal exposure. This isn’t actual tape—it’s an electrical cable that wraps around your pipes and generates controlled heat to keep water above freezing. Modern self-regulating heat tape adjusts its output based on temperature, using more power when it’s colder and shutting off when it’s not needed. That saves electricity and prevents overheating.
Installation matters more than most people realize. Run the heat tape along the bottom of the pipe at the six o’clock position, secure it with fiberglass tape (not duct tape or electrical tape, which lose adhesion when heated), then cover everything with foam insulation. The insulation isn’t optional—it’s what makes the heat tape actually effective. Without it, you’re just heating the air around your pipes.
Plug heat tape into a GFCI outlet for safety. These outlets cut power if there’s any electrical issue, which matters when you’re running current near water. Some heat tapes come with built-in thermostats that automatically turn on when temperatures drop below 37 degrees and off when they rise above 50 degrees.
Seal the gaps while you’re at it. Cold air reaching your pipes usually comes through cracks around windows, doors, and where pipes penetrate walls. A few tubes of caulk and some spray foam insulation can eliminate drafts that drop temperatures in pipe-heavy areas. Weatherstripping around doors and windows keeps cold air outside where it belongs.
Want live answers?
Connect with a Go-Rooter Emergency Plumbers expert for fast, friendly support.
Despite your best prevention efforts, pipes can still freeze. Maybe you didn’t know about that vulnerable line in the attic. Maybe the temperature dropped faster than expected. Maybe your heat tape failed. Whatever the reason, you need to act fast.
The first sign is usually no water at the tap. You turn on the faucet and get nothing, or just a weak trickle. That’s your frozen pipe alarm bell. Don’t ignore it and hope it thaws on its own. Every hour that pipe stays frozen increases the chance it’s going to burst.
Your main water shutoff valve becomes the most important thing in your house. Find it now, before you need it. In most Chicago homes, it’s near where the main line enters your house, usually in the basement. Turning off this valve stops water flow to your entire home, which means when that frozen pipe does crack, you’re not pumping hundreds of gallons into your walls and floors.
If you can access the frozen pipe and it hasn’t burst yet, you might be able to thaw it yourself. Emphasis on “might.” This isn’t the time to be a hero if you’re not confident about what you’re doing.
Safe thawing uses gentle, controlled heat. A hair dryer works well for accessible pipes. Start near the faucet end and work toward the frozen section, keeping the dryer moving. Never leave it in one spot—you’ll overheat the pipe and potentially cause it to crack. An electric heating pad wrapped around the frozen section provides consistent warmth without the risk of overheating.
Hot towels soaked in water and wrapped around the pipe can slowly thaw ice without thermal shock. You’ll need to reheat them every few minutes as they cool down, but this method is safe for any pipe material. Space heaters placed near frozen pipes in basements or crawl spaces can raise the ambient temperature enough to thaw things out, though this takes longer.
Open the affected faucet before you start. As ice melts, water and steam need somewhere to go. An open faucet relieves pressure and shows you when water starts flowing again.
Here’s what not to do: Never use a propane torch, kerosene heater, or any open flame near your pipes. Yes, it’ll thaw them faster. It’ll also potentially start a fire, damage your pipes from thermal shock, or cause them to burst from rapid pressure changes. The city of Chicago specifically warns against using candles or open flames for pipe thawing, and there’s a good reason for that.
When should you call for professional frozen pipe repair instead of DIY? If the frozen pipe is behind a wall or ceiling where you can’t reach it, you need a pro. If you’ve got no water anywhere in your house, your main supply line might be frozen, which is beyond DIY territory. If you see water stains, bulging pipes, or cracks, that pipe has already failed or is about to—shut off your main water valve and call immediately.
Professional plumbers have equipment you don’t. Infrared cameras that pinpoint exactly where pipes are frozen. Specialized thawing tools that safely warm pipes without damage. Pressure testing equipment that finds hidden cracks before they become floods. We can also access pipes in walls, under slabs, and in other impossible-to-reach locations.
The cost difference between professional thawing and water damage cleanup isn’t even close. Simple pipe thawing runs a few hundred dollars. Water damage from a burst pipe? You’re looking at thousands, plus the hassle of displaced furniture, ruined belongings, and potential mold issues.
Most homeowners insurance policies cover water damage from frozen pipes that burst—with some important caveats. Understanding what’s covered before disaster strikes saves headaches when you’re filing a claim.
Your policy typically covers “sudden and accidental” discharge from plumbing. A pipe that freezes and bursts during a cold snap usually qualifies. The insurance will pay for water damage to your floors, walls, ceilings, and belongings. They’ll cover cleanup, repairs to damaged drywall and flooring, and replacement of ruined furniture or electronics.
What they won’t cover is the pipe repair itself. Insurance sees that as maintenance, not covered damage. You’re paying out of pocket to fix or replace the burst section of pipe. They also won’t cover damage if they determine you were negligent—like turning off your heat and leaving town for a week in January without draining your pipes.
Temperature requirements matter. Many policies require you to maintain your home at a minimum temperature, usually 55 degrees, even when you’re away. Drop below that, and your coverage might be denied. Some policies require you to drain your plumbing system if you’re leaving the home vacant during winter.
Documentation becomes crucial if you do have a claim. Take photos and videos of the damage before you clean anything up. Save receipts for emergency plumber calls, water extraction services, and any temporary repairs. Make a list of damaged belongings with approximate values. Your insurance adjuster will want all of this.
Call your insurance company as soon as you discover the damage, but don’t wait for them to approve things before stopping the water flow or preventing further damage. Most policies actually require you to mitigate damage, which means shutting off water, extracting standing water, and preventing mold growth. Save all receipts for these emergency measures.
Professional plumbers can help with insurance documentation. We provide detailed reports of what failed, why it failed, and what repairs were necessary. This paperwork carries more weight with adjusters than your own assessment. Some plumbing companies even work directly with insurance companies to streamline the claims process.
Chicago winters aren’t getting any warmer, and your pipes aren’t getting any younger. The seven prevention strategies we’ve covered—insulating vulnerable pipes, installing heat tape, sealing drafts, maintaining consistent temperatures, draining outdoor fixtures, opening cabinet doors during cold snaps, and knowing when to call for help—work together to create layers of protection.
Prevention costs less than repair. Always. A few hundred dollars in insulation and heat tape beats a few thousand in water damage cleanup every time. But even with perfect prevention, you can’t control everything. Extreme cold snaps, power outages, or equipment failures can still create frozen pipe emergencies.
That’s when having a reliable emergency plumber matters. We’ve been handling Cook County’s frozen pipe disasters since 1995, with 24/7 availability and response times that get our technicians to your door fast. Whether you need preventative winterization before the cold hits or emergency thawing when your pipes freeze at 2 AM, local expertise makes the difference between a minor inconvenience and a major disaster.
Article details:
Share:
Continue learning:
Request a Callback
Want to skip the wait?
Simply enter your contact details, and we’ll call you when a NY Spine Advisor becomes available.