Chicago winters are no joke. Learn how proper pipe insulation and fall preparation protect your home from frozen pipes, burst lines, and thousands in water damage.
Share:
Request a Callback
Want to skip the wait?
Simply enter your contact details, and we’ll call you when a Go Rooter Advisor becomes available.
Summary:
You’ve seen the forecast. Temperatures are dropping, and Chicago’s first freeze is coming faster than you’d like. Right now, water is sitting in your pipes—in your basement, your crawl space, behind your exterior walls. When that water freezes, it expands by nine percent. That’s enough pressure to split copper, crack PVC, and turn a quiet Tuesday night into a flooded disaster that costs thousands to fix.
The good news? You still have time. A few smart moves this fall can save you from waking up to burst pipes, water-damaged walls, and an insurance claim that might get denied because you didn’t take “reasonable precautions.” Let’s talk about what actually works to protect your Cook County home from frozen pipes.
Pipe insulation isn’t complicated, but it matters more than most homeowners realize. The average frozen pipe insurance claim in the Chicago area runs over $12,000. Some hit $27,000 or more. That’s not a repair bill you want to face in January.
The concept is simple: insulation creates a barrier between your pipes and the cold air that wants to freeze them. But not all insulation is created equal, and not all pipes need the same level of protection. Your basement pipes face different risks than the ones in your attic or crawl space.
Focus on the vulnerable spots first. Pipes in unheated areas, pipes against exterior walls, and any plumbing in your garage or crawl space are sitting ducks when temperatures drop below 32 degrees. In Cook County, where January lows average around 19 degrees and wind chill makes it feel even colder, those exposed pipes don’t stand a chance without protection.

Walk into any hardware store and you’ll find a wall of insulation options. Some work great for Chicago winters. Others are a waste of money.
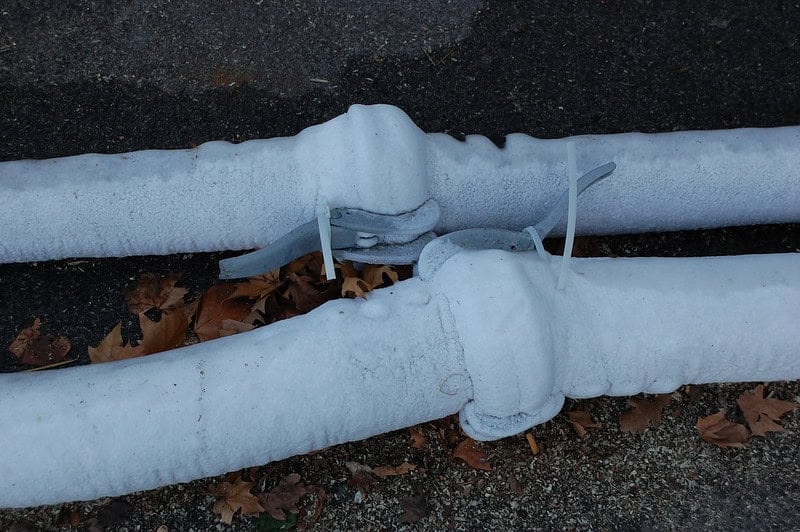
Foam pipe sleeves are your best starting point. They’re inexpensive, easy to install, and effective for most indoor applications. You just slip them over the pipe and seal the seam with tape. They come pre-slit, so you don’t need to disconnect anything. For pipes in your basement or along interior walls, foam sleeves provide solid protection without breaking the bank.
Fiberglass insulation works well for larger diameter pipes or areas where you need extra protection. It’s the same stuff used in your walls, just sized for pipes. You wrap it around the pipe and secure it with tape or wire. It handles moisture better than foam in damp crawl spaces, but it’s messier to work with and requires gloves.
Heat tape or heat cables are your nuclear option for pipes that absolutely cannot freeze. These are electrical heating elements that wrap around your pipes and plug into a GFCI outlet. They activate automatically when temperatures drop. They’re perfect for pipes in unheated garages or exposed sections that foam alone can’t protect. The upfront cost is higher—usually $50 to $200 depending on length—but they’re worth it for problem areas that have frozen before.
Here’s what doesn’t work: newspaper, old towels, or that random insulation you found in the garage. When those materials get wet from condensation or a small leak, they actually make things worse by holding moisture against the pipe. And they provide almost no real insulation value when temperatures hit single digits.
The key is matching the solution to the location. Foam sleeves for most basement and interior pipes. Fiberglass for crawl spaces with moisture issues. Heat tape for the trouble spots that keep you up at night. If you’re not sure which pipes need what, that’s exactly when you should call us. We’ve seen thousands of Chicago homes and know exactly where problems hide.
Your basement and crawl space are where most freeze damage starts. These areas stay colder than the rest of your house, and the pipes down there often run along exterior walls where cold air seeps in through cracks and gaps.
Start by sealing those cracks. Before you insulate a single pipe, walk your basement perimeter and look for gaps around where pipes enter the foundation, around windows, and along the rim joist. A tube of expanding foam or caulk costs five bucks and stops cold air from reaching your pipes in the first place. Weatherstripping on basement doors and windows helps too.
Once you’ve sealed the obvious air leaks, identify which pipes need insulation. Hot water pipes and cold water supply lines both need protection. Hot water pipes lose heat quickly in cold basements, making your water heater work harder. Cold water pipes are the ones that freeze and burst. Insulate both.
Measure your pipes before you buy materials. Most residential pipes are either half-inch or three-quarter-inch diameter. Foam sleeves come sized to match, and buying the wrong size means a second trip to the store. Measure twice, buy once.
Installation is straightforward. Slide the foam sleeve over the pipe, making sure the pre-cut seam faces up or to the side where you can reach it. Use the self-adhesive strip if it has one, or wrap duct tape every foot or so to keep it in place. Pay special attention to joints, elbows, and valves—these spots lose heat faster and need extra coverage. You can use small pieces of foam or fiberglass to wrap these areas, then tape them securely.
For crawl spaces, consider adding a layer of fiberglass insulation around foam sleeves if you’ve had freeze problems before. Crawl spaces are notoriously cold and damp, and the extra layer provides insurance. Just make sure you’re wearing gloves and a mask—fiberglass is itchy and you don’t want to breathe the particles.
If your basement stays consistently below 55 degrees in winter, or if you’ve had pipes freeze before, heat tape might be necessary. Install it according to manufacturer directions, making sure it doesn’t overlap itself and that it’s plugged into a GFCI outlet. Never use heat tape on plastic pipes unless it’s specifically rated for that use.
The whole job takes a few hours for most basements. It’s not exciting work, but it beats dealing with a burst pipe at midnight when it’s ten degrees outside and water is pouring through your ceiling.
Want live answers?
Connect with a Go-Rooter Emergency Plumbers expert for fast, friendly support.
Outdoor faucets are the number one freeze point in most Chicago homes. The pipes feeding those faucets run through exterior walls where they’re exposed to brutal cold. Leave a hose connected or forget to shut off the interior valve, and you’re asking for trouble.
The first freeze in Chicagoland typically hits in mid-to-late fall, but it can arrive as early as late September. Once you see overnight lows dipping toward 40 degrees, it’s time to winterize. Don’t wait for the forecast to show 32—by then it might be too late.
Winterizing outdoor faucets is simple, but you have to do it right. Miss a step and water trapped in the line will freeze, expand, and crack the pipe inside your wall. That’s when you get the kind of water damage that floods your basement and ruins drywall.
First, disconnect every garden hose from every outdoor faucet. This seems obvious, but it’s the step people skip most often. A connected hose traps water in the faucet and the pipe behind it. When that water freezes, it backs up into your house and cracks the pipe. Drain the hoses completely, coil them up, and store them in your garage or basement.
Next, locate the shut-off valve for your outdoor faucets. Most homes have an interior valve somewhere in the basement, usually on the wall directly behind where the outdoor faucet is located. It’ll be either a ball valve with a lever handle or a gate valve with a wheel. Turn it clockwise until it stops. This cuts off water to the outdoor faucet.
Now comes the critical part: draining the remaining water. Go back outside and open the outdoor faucet by turning the handle counterclockwise. Leave it open. Any water still in the pipe will drain out. If your shut-off valve has a small bleeder cap or drain valve, open that too. This creates airflow on both sides and lets gravity do its job.
Let everything drain for at least a few hours. If you’re in a hurry, you can speed things up by blowing compressed air through the line, but most people just leave the faucet open overnight to be sure.
Once the line is drained, you have a choice. You can leave the outdoor faucet open all winter, which allows any remaining water to expand without breaking anything. Or you can close it to keep cold air from blowing back through the pipe into your house. Either works, but leaving it slightly open is safer if you’re not 100% certain the line is completely dry.
The final step is adding a faucet cover. These insulated foam covers cost a few dollars and provide an extra layer of protection against wind chill and extreme cold. They’re not a substitute for shutting off the water and draining the line, but they help. Secure the cover tightly so wind doesn’t blow it off.
If you have a frost-free outdoor faucet, the process is similar, but these faucets are designed to drain automatically when you shut them off. The valve is located several inches inside the house where it’s warmer, and the faucet slopes slightly to let water drain out. Still disconnect your hoses, still shut off the water, and still let it drain. Frost-free doesn’t mean freeze-proof, especially if a hose is left attached.
Skip these steps and you’re rolling the dice. Maybe you get lucky and make it through winter without problems. Or maybe you don’t.
When water freezes inside the pipe feeding your outdoor faucet, it creates an ice plug. That plug effectively seals the pipe. As more water freezes behind it, pressure builds exponentially. The pipe material doesn’t matter—copper, PVC, PEX, galvanized steel—they all split under enough pressure. The break usually happens inside your wall where you can’t see it.
You won’t know there’s a problem until temperatures warm up and the ice melts. Then water starts flowing through the crack. It soaks your insulation, runs down inside your walls, and pools in your basement or crawl space. By the time you notice water stains on your ceiling or wet carpet, the damage is done.
The repair bill adds up fast. You’re looking at the cost to access the broken pipe by opening up walls or ceilings. Then the plumbing repair itself. Then drywall repair, painting, and possibly flooring replacement if water soaked through. Then there’s the water damage remediation—industrial fans, dehumidifiers, mold prevention. Insurance might cover some of it, but many policies deny claims if you didn’t take basic winterization steps.
The average burst pipe repair costs $500 to $3,000 just for the plumbing work. Water damage can easily double or triple that. And if mold starts growing in your walls because the damage wasn’t caught quickly, you’re looking at specialized remediation that can run $10,000 or more.
All of this to avoid spending 30 minutes disconnecting hoses and shutting off a valve. The math doesn’t add up. Winterize your outdoor faucets. Every single one. Every single fall. It’s not optional in Chicago.
Chicago winters don’t give second chances. Once temperatures drop and pipes start freezing, you’re in reaction mode. The time to protect your home is now, while you can still work outside without gloves and your pipes are still flowing.
Insulate the vulnerable pipes in your basement and crawl space. Winterize every outdoor faucet before the first freeze warning. Check your fall home maintenance list and make plumbing a priority—it’s cheaper than water damage and a lot less stressful than dealing with burst pipes in January.
If you’re not sure which pipes need attention, or if you’ve had freeze problems before and want a professional assessment, we can help. We offer camera inspections that identify vulnerable spots before they become expensive emergencies, and we’re available 24/7 if prevention wasn’t enough and you need help fast.
Article details:
Share:
Continue learning:
Request a Callback
Want to skip the wait?
Simply enter your contact details, and we’ll call you when a NY Spine Advisor becomes available.